|
|
How to Test Run an Outboard Motor When Not on a Boat in the Water |
 |
|
|
How to Test Run an Outboard Motor When Not on a Boat in the Water |
|
One thing commonly known to most boaters, but not all newbies is that most outboard motors are water cooled (either artificially, or on a boat in a lake) and the water is pumped up into the powerhead to cool it. This being the case, NEVER run the motor without it being supplied sufficient water in one manner or another. Otherwise you will (1) ruin the water pump impeller even by running a few seconds. (2) If ran longer, since the motor is not cooled it will get hot enough to loose the temper in the piston rings, possibly even seizing the pistons in the cylinders and also seizing the motor. NOT A GOOD THING. Usually this is also accompanied with the paint on the powerhead becoming so hot the paint burns. A white powerhead now will be brown in the piston area.
Therefore, you need to be informed on how to test run your motor when not on a boat, in the water. This could be after you take it out of storage (long or short term), or if it was used in saltwater, it is then best to flush (run) it with freshwater long enough for the motor to warm up so the thermostat opens allowing the water to flow through the complete cooling system.
The method will depend on the make of the motor, the year of manufacture, and the size of the motor. The early (up until the early 1990s) motors did not have any provision for this, therefore requiring it to be submerged in a barrel.
Obviously what can be done on these older motors with a small 4 to 10 hp motor may be hard to do with a 35 or 50hp motor. A small motor may be able to be ran in a 5 gallon bucket where a 50 hp will require something much larger and a different method of getting it to the water.
Some older small motors did not have a gearbox where it had a neutral/forward or reverse. For these motors, the prop was always in gear. Most however, when ran in a small bucket need to be in neutral if possible, to eliminate splashing water out and then starving the water pump. Even a 6 hp motor in a 55 gallon barrel when in gear and revved to maximum will BLOW water up and out the rear top.
You have to also realize that anytime you run
one of these motors where it is not on a boat in the water, and able to rely on
the water to provide needed resistance to the prop, that it SHOULD NOT be revved
up much over a high idle, as the engine now has no resistance from the
prop/water connection and there is a chance it will "Run Away With Itself",
thereby revving so fast that you may do major internal damage to the motor.
The number one requirement is to have a water flow into the motor. All
water cooled motors will have a water intake on the lower unit. The older
ones could have it through a screened tube in the exhaust housing outlet
directly behind the propeller. Later motors will have the intake through
slots located above the prop but in the main gearbox housing, centered in the
main (largest) section, and they will usually be on both sides of this housing.
These can utilize the "MUFF", which is a metal yoke holding rubber cups that
cover these water inlets. Usually only one cup will have access fitting to
connect to your city water hose.
The older motors with the inlet behind the prop,
will need to be ran in a barrel.
With the above said, it is imperative to check these water inlets to be free of
debris before you try to start the motor. And as important, if you have it
running but the motor is not peeing, before you get excited and tear it apart to
replace the water pump, or just the impeller, CHECK these water inlet screens.
The earlier screens behind the prop, are considerably more prone to become
plugged with weeds than the later motors, simply because they have smaller
holes.
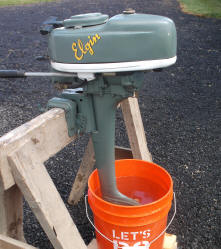
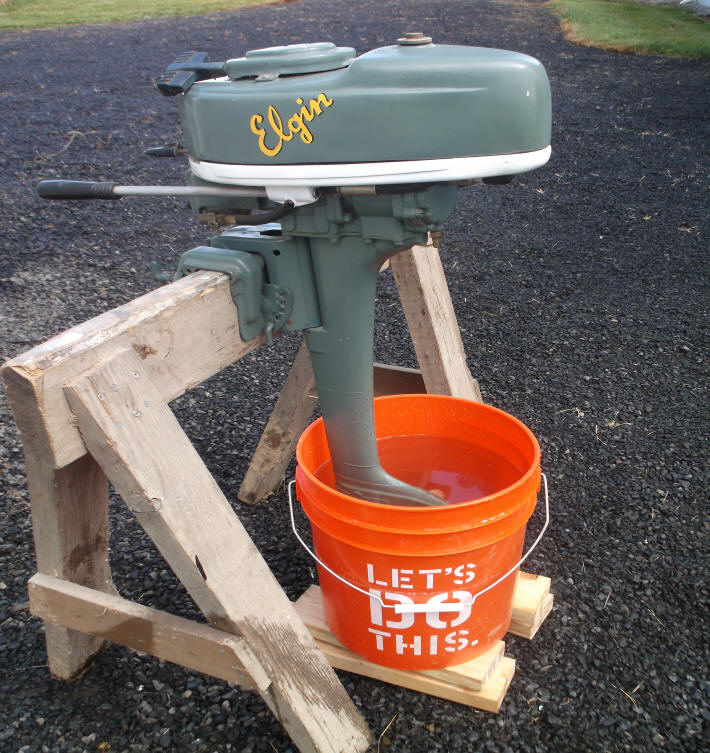
Different Methods, Type One ; c One of the earliest and simplest methods to do a test run on a small outboard motor is to fill a bucket with water and put the lower unit in the water. You will need some form of a mounting to keep the motor stationary, here the normal thing is to use a carpenter's sawhorse. The water height NEEDS TO BE high enough to cover the water pump intake screen/holes, as seen in the photo below. Also in this photo, you will see wooden blocks UNDER the bucket to accomplish this task of raising the bucket.
This motor has no transmission so the prop turns all the time the motor is running, thereby possibly needing water to be replenished as it is thrown out. Also you would have to be careful to not allow the prop to hit the sides of the bucket. This plastic one may not damage the OBSOLETE prop, but a metal bucket may do so. And finding replacement props for these old motors me be near impossible AND EXPENSIVE even if you could find one.
| Here using an old (1947) small 2.5hp motor & a 5 gallon bucket of water to test run |
 |
For those who live on a farm, a cattle watering trough can even be used. I knew one guy who even backed his boat/motor up to his trough, let the motor down in the water while still on the boat, and ran this to flush out any saltwater.
The Ultimate Run in a Barrel : To make one of these run barrels seen in the photo below, use a 55 gallon steel fuel/oil barrel, cut part of the top out, but leave about 1/3 still attached. Cut back about 5" along the sides of this remaining top. Now bend this 5" section down into the barrel to form a downward lip. This will allow you to rev up the engine for short periods of time while in gear without blowing the water up and out of the barrel, (and all over yourself) as this baffle diverts the prop water back down into the barrel.
This barrel has been used to run motors up to 25hp, but the chore is they are heavy enough that this is usually a 2 person job.
| Using this rear baffle in the 55 gallon test barrel, a higher RPM can be achieved. |
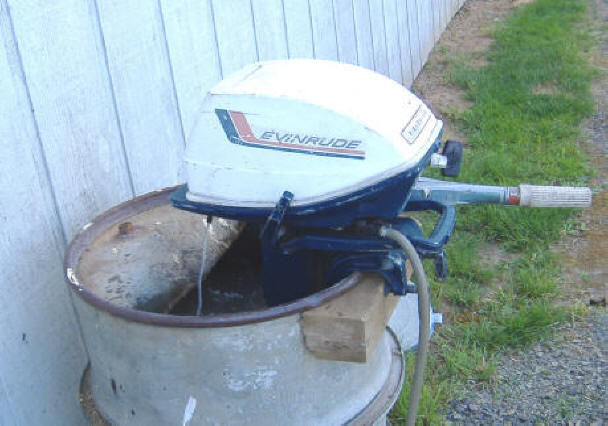 |
One thing to check, is that if you leave the barrel set outside from year around with water in it, and you may have trees nearby, you should check for debris that gets inside. In the photo above you will be able to see on the ground beyond the barrel, the top of a galvanized garbage can that is used to keep debris out when not in use.
Also if you run motors a lot, these barrels seem to accumulate a lot of unburned fuel oil mix, so you need to empty and clean it occasionally.
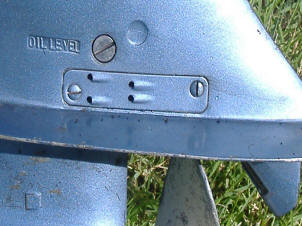
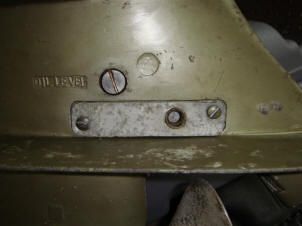
Different Methods, Type Two ; The right photo below is from a 10hp Johnson and has a commercial aftermarket adapter (no longer available) with a 3/8" course thread placed inward in the rearward part. This allows the usage of Mercury's Quick-Silver Flushing Device described below. This flush plate apparently was NOT designed to be used when running, only for flushing, however this motor was a running motor, with no evidence of failure even with the flush hole plug missing. Since these are no longer made, you can fashion one by using the original plate as a sample/template, and soldering/brazing, (even epoxy) a 3/8" National Course nut onto the outside of it to screw the flushing adapter into. Or if your intention is to leave it in place and run the motor that way, I would solder the nut on the inside to give less resistance and less chance of debris hanging up on anything exposed.
| Evinrude with original reverse water inlet plate | Johnson with aftermarket flush plate |
 |
 |
In the LH photo below, Mercury sells a flushing adapter that uses a 3/8" National Course bolt thread on one end and a female garden hose end on the other. Mercury's Quick-Silver part number is #24789A 1 with the actual name being Flushing Device. Also OMC Johnson/Evinrude uses the same adapter to back-flush their 9.9/15hp 2 stroke outboard motors (and maybe more models) made from 1993 to 2007. These adapters also fit about all of the Japanese outboards that use a back-flush system.
You can remove the 3/8" plug bolt, screw the garden hose into the adapter, then into the motor, then turn on the water. It does not need to be full force of the standard house water pressure, but about 1/2 force. Start the motor up and let it run for long enough to get the motor warm enough to open the thermostat allowing water to flush thru the power-head.
In the RH photo below, you see a readers removable unit made from scrap metal and a trip to Home Depot.
| Mercury Outboard Flush Device #24789A 1 | Here you see a readers removable version |
 |
 |
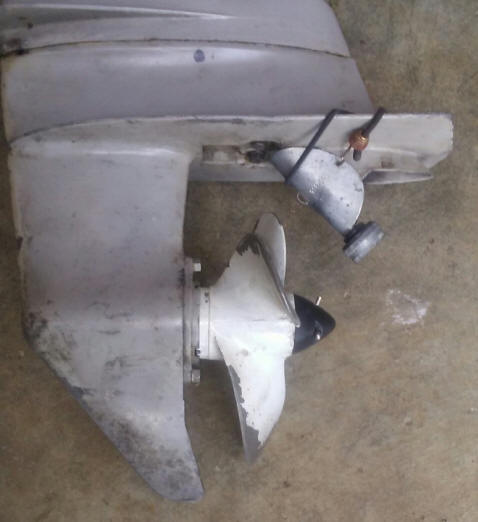
Different Methods, Type Two & a Half ; OMC motors from the the late 1960s until the early 1990s main water supply to the water pump comes from a screened tube right behind the prop in the exhaust outlet which was carried over from earlier motors. Water is forced into the screened intake to the water pump by the prop thrust.
Some users
report that when running these motors in a barrel, (usually a small
one) that the prop has to be installed and usually in gear as apparently
they need to get more water pushed to the water pump by the prop to
get enough to cool when running at over an idle.
There is no stainless steel intake plate on the left side above the cavitation plate like the previous versions. Aftermarket flush kits for this motor are obsolete and rather scarce. There is really no provision currently available for a easy muff system to run this motor out of a tank. But there is hope. I think that I may be able, (by tearing mine down) to figure out a way to drill/tap/modify the lower unit near the water pump to where I may be able to utilize the later screw in flush adapters on this motor. But that is a project in itself.
Aftermarket Water Flushing Adapter Cover : This method of water intake does not allow the newer type of flushing muffs to be used. And soon after these motors came out with this type a water intake system, Tempo made Flush Kits #918FAA (as seen in the photos below) for a while for these motors, but now are not currently made and are rather scarce IF THE PERSON EVEN RECOGNIZES WHAT THE ARE. Those of you who frequent garage sales may be on the lookout for these.
| 1984 Johnson 6hp with Tempo Flush Kit in place |
 |
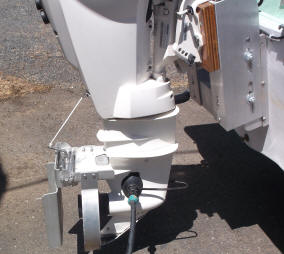
Different Methods, Type Three ; The method most used on later motors is using a "MUFF". These are commonly used to flush a motor after it has been ran in saltwater. I personally like to start my motor and run it the night before I take it out, just to be sure it starts for one and to also be sure that I will not have any problems when it hits the water. These units can handle motors upwards into the 200 hp plus size.
These are simply a device that straddles the lower unit
putting enough tension on what appears to be large rubber suction cups that cover the water
intakes. You attach a garden hose to your faucet and the other to the
muffs, turn the water on and start the motor. These are normally used
while the motor is still attached to the boat on the trailer.
The secret here is to not run full force water into the muff, as you can blow
water into areas that are not normally seen by water. These outboard motor
water pumps do not supply water in a lot of pressure, so cut back on the amount
you allow in.
Again it is not a good idea to run any motor at a high speed for more than a few seconds if not on the boat and in the water.
| Here the MUFF is slid over the front & over the intake screens on this 25 hp Evinrude E-Tec |
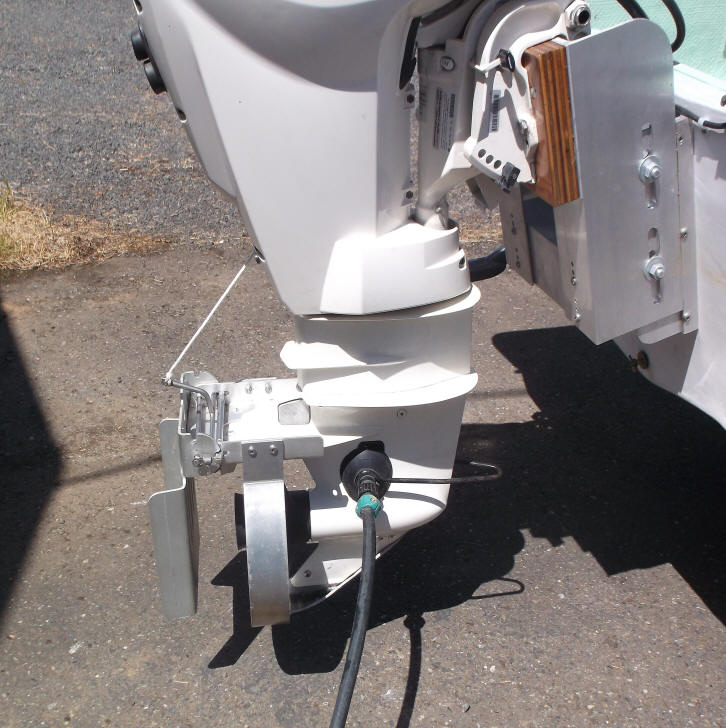 |
On the motor in the photo above you will see a Prop Guard AND a Happy Troller plate, along with a Jack Plate used to raise the motor to be able to run in SKINNY water.
copyright © 2018 - 2019 LeeRoy Wisner All Rights
Reserved
Back to Ramblings
Originally
stated 06-09-2018, Last Updated 09-15-2019
Contact the author